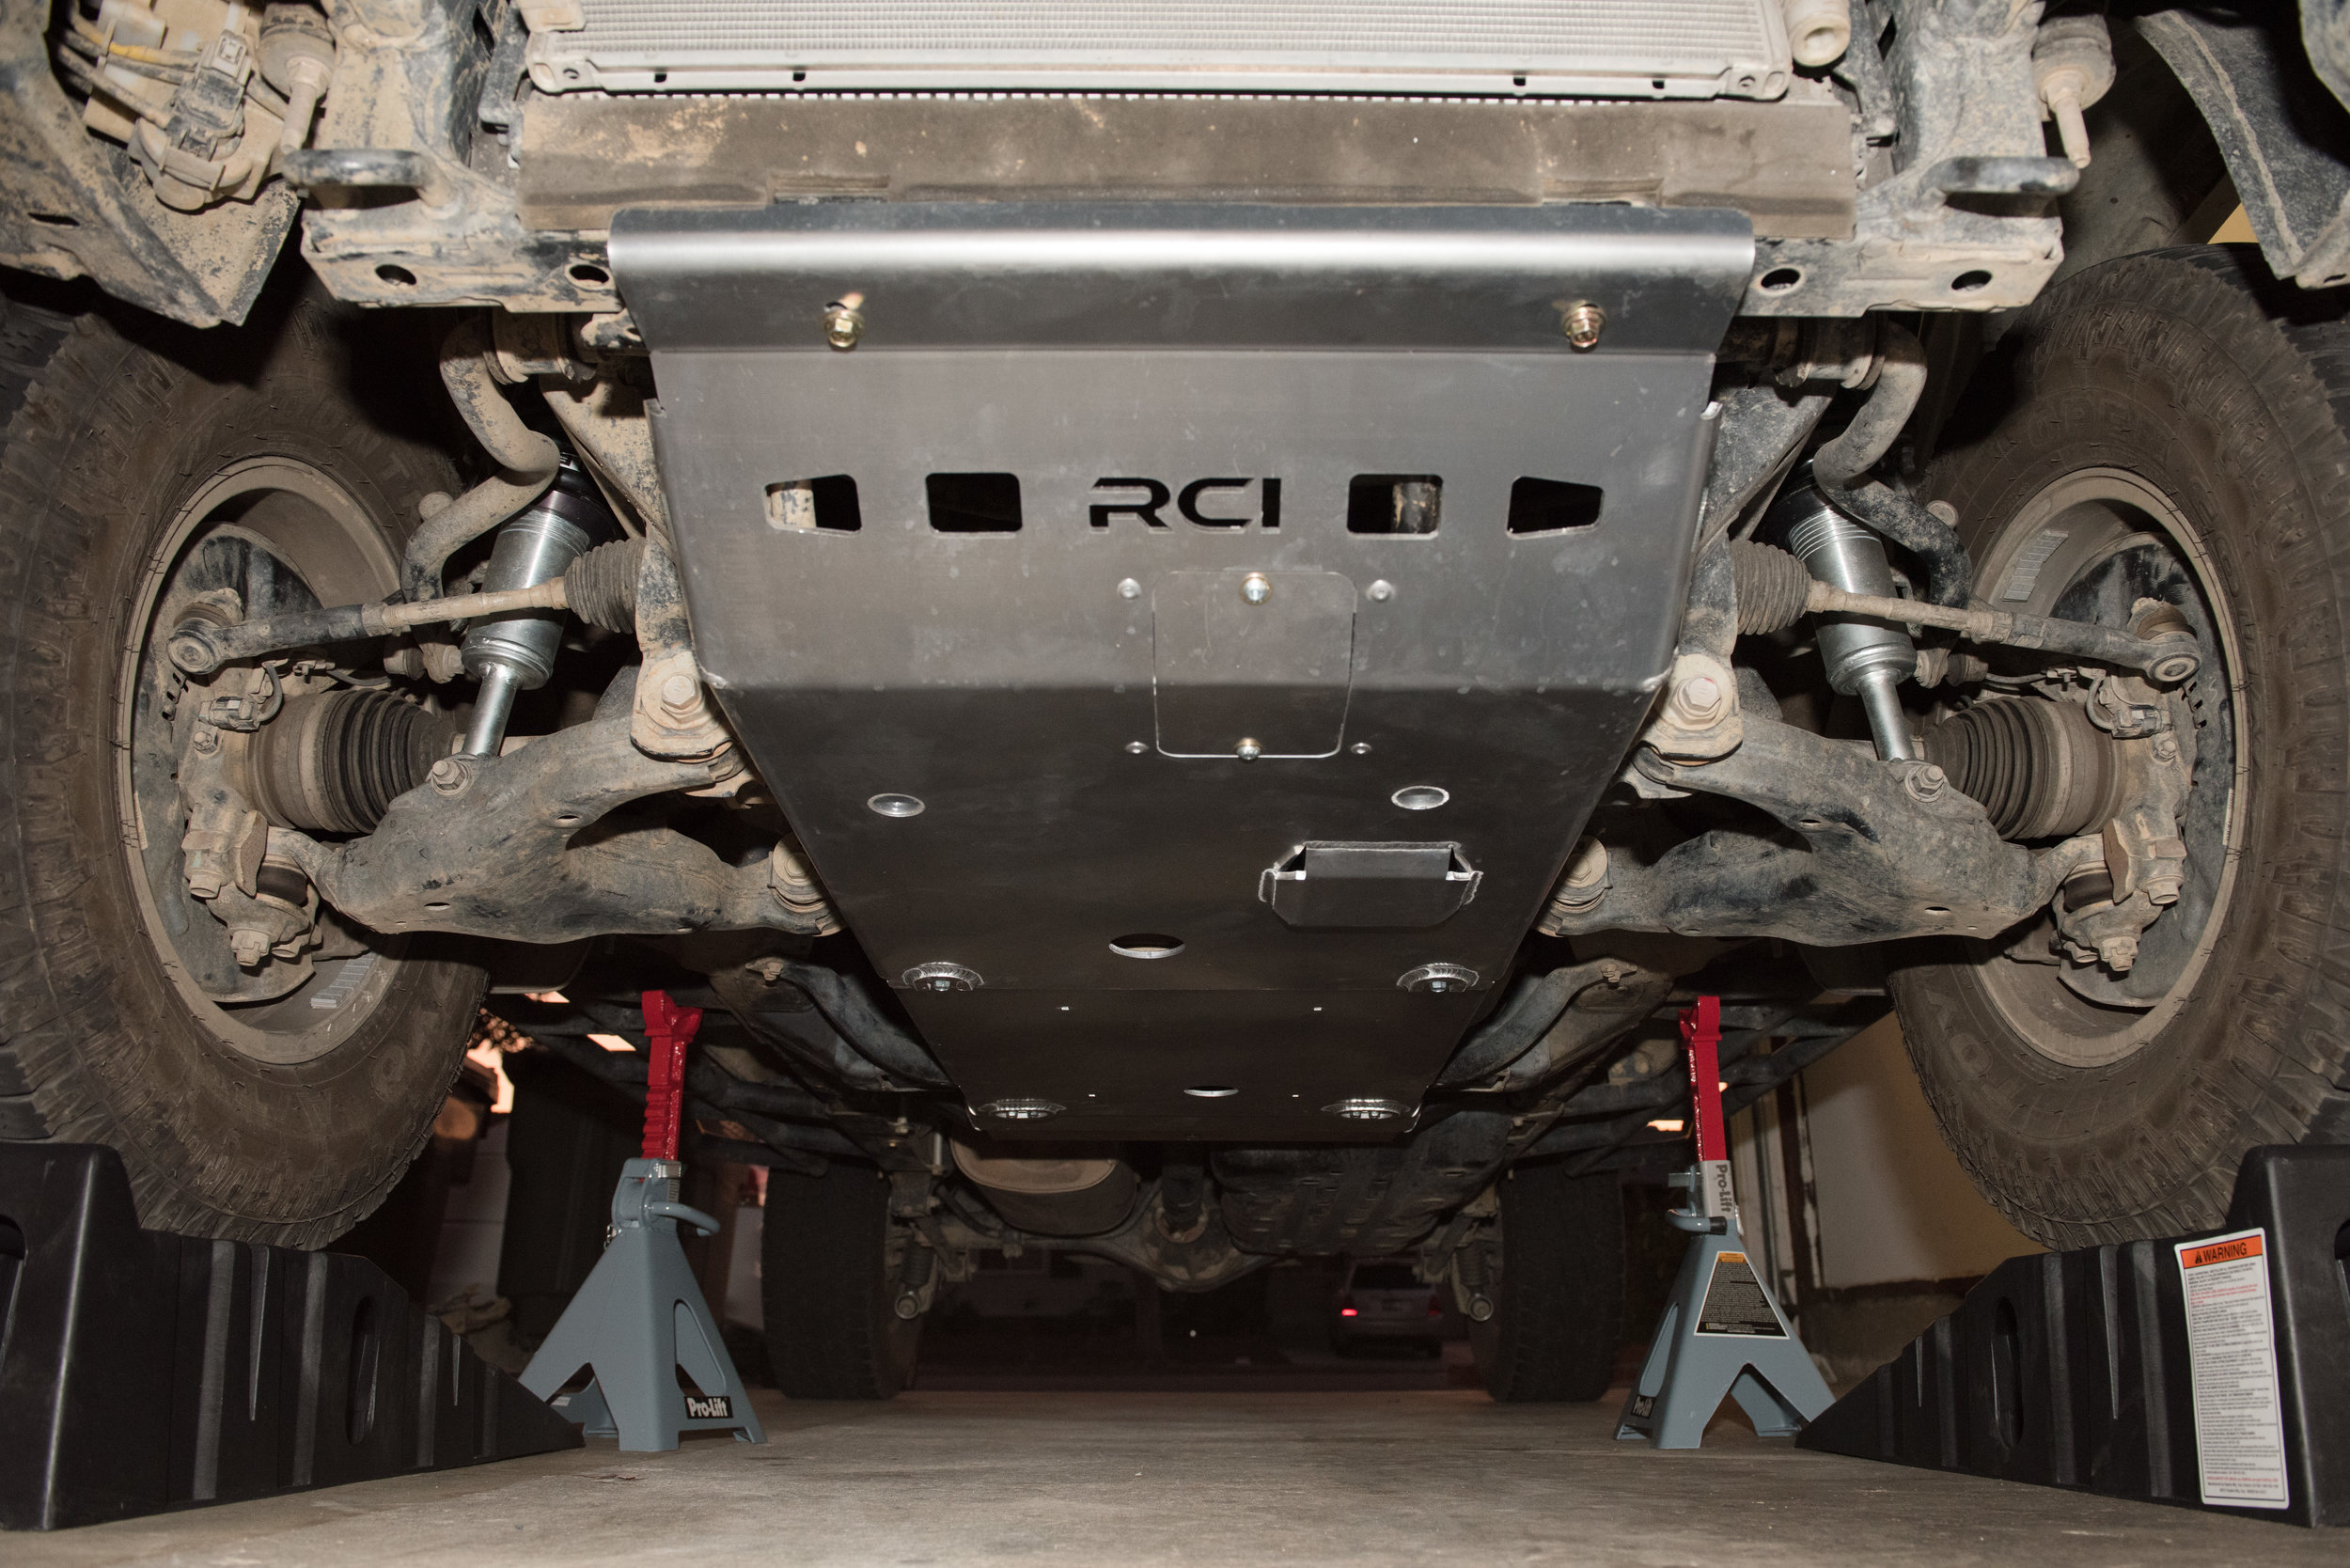
Overview
I don’t plan to undertake any serious rock-crawling in the 4Runner. However, I have been wanting to complete more difficult off-road trails, but have been worried about damaging critical engine/drive train components while wheeling. This is especially a concern since I often wheel by myself (albeit cautiously) and cannot afford getting stuck in the middle of nowhere.
All 4Runners come with a front skid plate from the factory. The OEM skid plate, which covers the front engine area (two cross-members, the front differential, and oil pan), is made of thin steel that can definitely take a pounding, but is only so-strong and provides no coverage for the nearby transmission, transfer case (and additional cross-members), or stock exhaust crossover. TRD skid plates cover the same area but are constructed from 1/4” thick aluminum. Furthermore, the skid plate must be dropped each time an oil change is performed (not a huge deal, but could be a factor in installing aftermarket skids?).
There are a handful of different companies that fabricate aftermarket skid plates for the 4Runner, typically using either 3/16” steel or 1/4” aluminum. Steel is often revered for its durability, strength, and ability to allow the vehicle to “slide” over an obstacle. Aluminum is revered for being lightweight, strong (though not as strong as steel), and light. Steel is very heavy - almost 3x the weight of aluminum. Furthermore, untreated steel corrodes unlike aluminum (although aluminum can corrode in some cases). Since aluminum is a softer metal, it is also more likely for a rock (or other hard obstacle) to gouge the surface of the metal and “stick” to it, rather than “slide” over it. There are plenty of debates I’ve observed on various forums and other media weighing the opportunity cost of steel versus aluminum skid plates, but since I know I don’t do much hardcore rock crawling or wheeling
I had been eyeing a full skid package from RCI Metal Works (in aluminum) for a almost half a year, but finally decided to pull the trigger during a recent Labor Day sale. “Why aluminum?” you might ask. Well, I based the decision on three considerations: (1) the 4Runner is my daily driver and weight is a factor; (2) rust is of the devil and I want to perform as little maintenance as possible on the skid plates over the lifetime of the vehicle, and (3) aluminum can be kept exposed and matched the appearance I wanted to create.
Lo-and-behold! About 3-4 weeks after ordering I received 5 packages in the mail from RCI Metal Works. These included:
1/4” aluminum full skid plate package
Front engine skid plate
Transmission skid plate
Transfer case skid plate (with supporting steel cross member powdercoated black)
5/16” steel filler skid plate (extra add-on)
Photo below is of packaged components as-received.
Unpacked photos below in order are:
Filler skid-plate
Front engine skid plate
Transmission skid plate
Transfer case skid plate (and cross member support)
Here are some photos of the full kit basically set-up and ready for install.
Tools
Floor jack (optional)
Jack stands (optional)
Vehicle ramps (optional)
Anti-seize
3/8” socket wrench
10mm, 12mm, and 13mm sockets
3” 3/8”-extension
I found it easiest to raise the front-end on vehicle ramps, though others may prefer to jack up the front-end and place on jack stands. I have a ~2” suspension lift installed, which also provided a little extra clearance. Yes, I used jack stands with the vehicle ramps. You never know when plastic will break!
Since these skid plates are aluminum, it was easy for me to install by hand without a friend or jack. Steel, which is much heavier, would likely have been an issue for me to install solo.
Front Engine Skid Plate Install
The front-engine skid plate directly replaces the OEM front-engine skid plate. Hardware includes:
Six 5/16” washers
Two M8x40mm hex bolts
Four M8x30mm hex bolts
Two 3/8” nylon spacers
Sorry, I jumped the gun before taking pre-install pictures of the OEM skid plates. However, the steps are as follows:
Using 10mm socket, remove OEM plastic filler plate between front bumper and front engine skid plate.
Using 12 mm socket, remove OEM front engine skid plate (two parts)
Lift RCI front engine skid plate into place. Using 13mm socket, loosely install the four M8 30mm bolts with washers into the two front and two center mounting holes. Apply anti-seize to bolts before installation. Use the 3” extension to install bolts into the center mounting holes.
With the skid plate now self-supported by the four 30mm bolts, Using a 13mm socket, loosely install the two 40mm bolts with nylon spacers at the rear of the skid plate at vehicle cross-member. Apply anti-seize to bolts before installation. The nylon spacers should be placed on top of the skid plate, between the frame and skid plate.
If not installing the transfer case skid plate, adjust all skid plates so they are evenly spaced and torque all bolts to factory torque specs (21 ft-lb, I think). If installing transmission skid plate, leave about 1/2” of space to allow transmission plate to slide in-between cross member and front engine skid plate.
Transmission Skid Plate Install
More photos this time! I believe the kit comes with more hardware (as outlined in written instructions), but since I purchased the set it includes the minimum. Hardware includes:
Four 5/16” washer
Four M8x50mm hex bolts
Steps are as follows:
Using a 12mm socket, remove four bolts connecting frame support tubes to transfer-case cross member and discard.
Lift front of plate and slide notched cutouts into gap between front engine skid and crossmember. Lift the nylon spacers so they are sandwiched between the transmission skid plates and cross-member. The order will be front engine skid plate, then transmission skid plate, then spacer, then cross-member. The notched cutouts will fit perfectly around the bolts, with some leeway.
Using a 13mm socket, loosely install four M8x50mm bolts with washers at rear of transmission skid plate, with the frame support tubes sandwiched between the skid plate and cross-member. Apply anti-seize to bolts before installation.
If not installing the transfer case skid plate, adjust all skid plates so they are evenly spaced and torque all bolts to factory torque specs (21 ft-lb, I think). If installing transfer case skid plate, leave as large a gap as possible at the rear of the transmission skid plate.
Transfer Case Skid Plate Install
This kit came with some extra nuts and bolts. But hardware needed includes:
Two 5/16” washers
Two M8x30mm hex bolts
Three 7/16”x1” carriage bolts
Three 3/8” washers
Three 7/16” nylock nuts
Two 3/8” u-shaped zinc spacers
The zinc spacers are especially important to increase clearance between the skid plate and exhaust crossover.
Steps are as follows:
Using a 12mm socket, identify brake line bracket on driver’s side of frame. Remove bolt. RCI cross-member will bolt into this hole, and corresponding hole on opposite frame rail.
With the help of a friend or jack, lift cross-member into position. Using a 13mm socket, loosely install two M8x30mm hex bolts with washers. Apply anti-seize to bolts before installation. With bolts loosely installed, ensure cross member “tabs” at end are parallel with and touching frame. This ensure the cross-member is seated tightly against the bottom of the frame. Using a jack will ensure upward pressure is maintained. Tighten M8x30mm bolts - I did hand-tight with a quarter turn - no torque specs given.
Lift transfer case skid plate into position. Align notched cutouts at front of skid plates with loosened bolts at rear of transmission skid plate. Slip into place.
Lift rear of skid plate and install three 7/16” carriage bolts with threads facing up (towards vehicle). Loosely install nylock nut and washer above cross-member using 13mm socket.
Where transfer and transmission skid plates meet, install 3/8” u-shaped zinc spacer in between transfer case skid plate and crossmember frame tubes.
I had difficulty with this step because the frame support tubes (sandwiched between the frame and skid plates) were flexing down towards the ground. To address this, I fully remove all four bolts. Then I used a jack to apply an upward force on a support tube (to compress it against the cross-member). Once the cross-member was compressed, I easily re-inserted the bolt and u-shaped spacer. I tightened the bolts a little then did the same to the other support tube.
Adjust all skid plates so they are evenly spaced. Torque all bolts to factory specs (21 ft-lb, I think).
I quickly determined the exhaust crossover was hitting the transfer case skid plate, even with the u-shaped spacers installed. A common quick-fix is to tighten up the rubber exhaust hangars with stainless steel hose clamps. There are two rubber exhaust hangars that need to be tightened - one on the driver’s side and one on the passenger’s side. The following photo is from the driver’s side. Don’t need to tighten these too much - just enough to slightly raise the exhaust crossover away from the skid plate.
Filler Plate Install
Without a filler plate there is an unsightly gap between the stock bumper and front engine skid plate. This leave a lot of room for debris to enter the radiator (no bueno). RCI’s filler plate definitely fills this gap - though it is only available in 3/16” steel powdercoated black.
Hardware included:
Two washers
Two bolts (10mm heads)
Steps to install include:
Slide filler plate into two bolt locations in front engine skid plate.
Using a 10mm socket, bolt front of filler plate in to bumper support tabs with two bolts and washers. Tighten hand-tight (don’t know if there is a torque spec for this… there probably is).
Tighten front-engine skid plate bolts to factory specs (21 ft-lb, I think).
Peace out, buddy!


